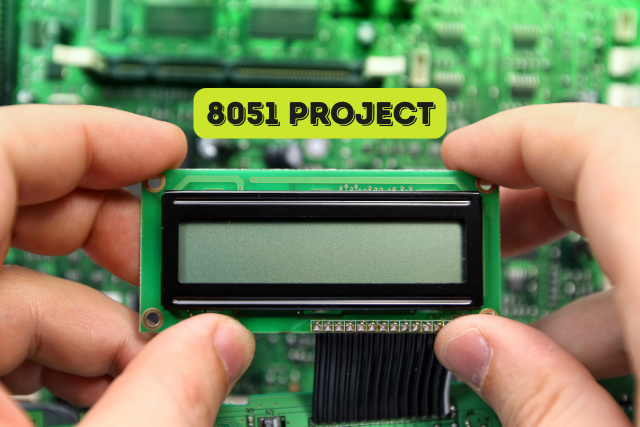
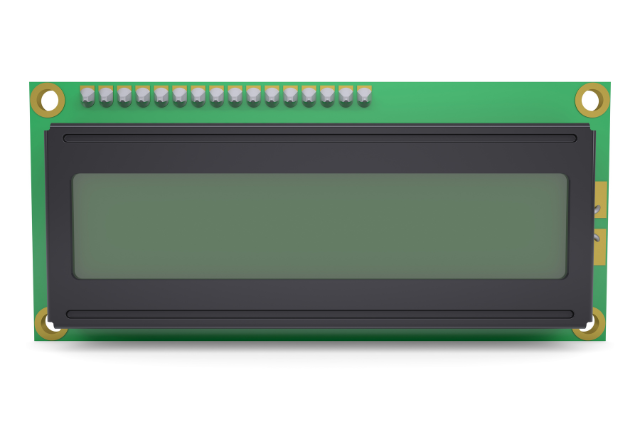
An LCD (liquid crystal display) is commonly used in electronic devices to display text, numbers, and other information. An LCD consists of a grid of pixels that can be turned on or off to create different characters and symbols.
Interfacing an LCD with a microcontroller like the AT89C51 involves sending control signals and data to the LCD through its input pins. The microcontroller can then control what is displayed on the LCD by sending the appropriate commands and data to the display.
To interface an LCD with the AT89C51, you must write a program in embedded C to send the necessary commands and data to the LCD. This program must initialize the LCD, set it up for use, and provide functions for sending commands and data to the display and displaying strings on the LCD.
LCD Pins
Several pins on an LCD are used for communication and control. Here is a list of some standard LCD pins and their functions:
- RS (register select): This pin selects between command and data modes. When RS is low (0), the LCD is in command mode, and the data sent to the display is interpreted as a command. When RS is high (1), the LCD is in data mode, and the sent data is interpreted as data to be displayed on the screen.
- RW (read/write): This pin selects between read and write modes. The microcontroller writes data to the LCD when RW is low (0). When RW is high (1), the microcontroller reads data from the LCD.
- E (enable): This pin enables the LCD to communicate. When E is high (1), the LCD is enabled and will read the data on the data bus. When E is low (0), the LCD is disabled and will not read the data on the bus.
- D0-D7 (data bus): These pins send data to the LCD and read data from the LCD. In 8-bit mode, all 8 data pins are used to send or receive data. In 4-bit mode, the data is sent in two 4-bit nibbles, with the upper nibble sent first.
- Vcc and GND: These pins provide power to the LCD. Vcc is the positive power supply, and GND is the ground.
- A and K (anode and cathode): These pins backlight the LCD. A is the anode, and K is the cathode. The backlight will turn on when a voltage is applied to the anode and the cathode is grounded.
Circuit Diagram Explanation
Connect the AT89C51 microcontroller to the LCD through the data bus (D0-D7), the RS, RW, E pins, and the Vcc and GND pins. The data bus sends data and commands to the LCD, while the RS, RW, and E pins are used for control. The Vcc and GND pins provide power to the LCD.
You will also need to connect the A and K pins to a voltage source and ground, respectively, to backlight the LCD.
Code in Embedded C
#include <reg51.h>

// LCD display pins
sbit RS = P1^0;
sbit RW = P1^1;
sbit E = P1^2;

// Data bus for LCD display
sbit D4 = P2^4;
sbit D5 = P2^5;
sbit D6 = P2^6;
sbit D7 = P2^7;

// Function prototypes
void lcd_init();
void lcd_cmd(unsigned char cmd);
void lcd_data(unsigned char data);
void lcd_string(unsigned char *str);
void delay(unsigned int t);

void main()
{
    lcd_init();  // Initialize LCD display

    // Display a message on the LCD
    lcd_string("Hello, World!");

    while(1);  // Loop forever
}

// Initialize LCD display
void lcd_init()
{
    // Set data bus as output
    P2 = 0x00;

    // Wait for LCD to stabilize
    delay(200);

    // Send initialization commands to LCD
    lcd_cmd(0x38);  // Set 8-bit mode, 2 rows, and 5x8 font
    lcd_cmd(0x0E);  // Display on, cursor on, and blink off
    lcd_cmd(0x06);  // Set increment mode and no shift
    lcd_cmd(0x01);  // Clear display and reset cursor
}

// Send a command to the LCD display
void lcd_cmd(unsigned char cmd)
{
    RS = 0;  // Set RS to 0 for command mode
    RW = 0;  // Set RW to 0 for write mode
    E = 1;   // Enable LCD

    // Send upper nibble of command
    D7 = (cmd & 0x80) >> 7;
    D6 = (cmd & 0x40) >> 6;
    D5 = (cmd & 0x20) >> 5;
    D4 = (cmd & 0x10) >> 4;
    delay(2);
    E = 0;  // Disable LCD

    // Send lower nibble of command
    E = 1;   // Enable LCD
    D7 = (cmd & 0x08) >> 3;
    D6 = (cmd & 0x04) >> 2;
    D5 = (cmd & 0x02) >> 1;
    D4 = (cmd & 0x01);
    delay(2);
    E = 0;  // Disable LCD
}

// Send data to the LCD display
void lcd_data(unsigned char data)
{
    RS = 1;  // Set RS to 1 for data mode
    RW = 0;  // Set RW to 0 for write mode
    E = 1;   // Enable LCD

    // Send upper nibble of data
    D7 = (data & 0x80) >> 7;
    D6 = (data & 0x40) >> 6;
    D5 = (data & 0x20) >> 5;
    D4 = (data & 0x10) >> 4;
    delay(2);
    E = 0;  // Disable LCD
    // Send lower nibble of data
    E = 1;   // Enable LCD
    D7 = (data & 0x08) >> 3;
    D6 = (data & 0x04) >> 2;
    D5 = (data & 0x02) >> 1;
    D4 = (data & 0x01);
    delay(2);
    E = 0;  // Disable LCD
}

// Display a string on the LCD
void lcd_string(unsigned char *str)
{
    while(*str)  // Continue until end of string
    {
        lcd_data(*str);  // Send next character
        str++;  // Move to next character
    }
}

// Delay function
void delay(unsigned int t)
{
    unsigned int i, j;
    for(i=0; i<t; i++)
        for(j=0; j<1275; j++);
}
This code should initialize the LCD and allow you to write a string. The lcd_init() function sends the necessary commands to set up the display, while the lcd_cmd() and lcd_data() functions allow you to send commands and data to the display, respectively. The lcd_string() function iteratively calls lcd_data() to display a string on the LCD. The delay() function provides a simple delay to allow the LCD to process the commands and data.
Techniques for scrolling text on LCD 16 x 2
Scrolling text on a 16×2 LCD involves manipulating the display control commands to shift the text horizontally or vertically. Here are the techniques for achieving both horizontal and vertical scrolling:
Horizontal Scrolling
Horizontal scrolling is more commonly used with 16×2 LCDs and can be achieved using the following methods:
1. Using LCD Commands
The LCD controller (usually a Hitachi HD44780 or compatible) provides commands to shift the display left or right. These commands can be used to scroll text horizontally.
- Shift Display Left:
0x18 - Shift Display Right:
0x1C
Example Code for Horizontal Scrolling:
#include <reg51.h>
#include "lcd.h" // Assumed to have basic LCD functions like lcd_cmd(), lcd_data(), etc.

void main() {
    lcd_init(); // Initialize the LCD
    lcd_cmd(0x80); // Set cursor to the beginning of the first line
    lcd_write_string("Scrolling Text");

    while (1) {
        lcd_cmd(0x1C); // Shift display right
        delay_ms(500); // Wait for half a second
    }
}

void delay_ms(unsigned int ms) {
    unsigned int i, j;
    for (i = 0; i < ms; i++)
        for (j = 0; j < 1275; j++);
}In this example, the display shifts right every half a second. You can use a similar approach to shift left by using the 0x18 command.
2. Manual Shifting
Another method is manually shifting the text by updating the displayed characters. This method involves:
- Storing the text in a buffer.
- Updating the display with a subset of the buffer.
- Shifting the subset by updating the starting index.
Example Code for Manual Horizontal Scrolling:
#include <reg51.h>
#include "lcd.h" // Assumed to have basic LCD functions like lcd_cmd(), lcd_data(), etc.

char text[] = "This is a longer scrolling text example.";
void scroll_text();

void main() {
    lcd_init(); // Initialize the LCD
    while (1) {
        scroll_text();
        delay_ms(500); // Wait for half a second
    }
}

void scroll_text() {
    static unsigned char index = 0;
    unsigned char i;

    lcd_cmd(0x80); // Set cursor to the beginning of the first line
    for (i = 0; i < 16; i++) {
        if (text[index + i] != '\0') {
            lcd_data(text[index + i]);
        } else {
            lcd_data(' ');
        }
    }

    index++;
    if (index == strlen(text)) {
        index = 0;
    }
}

void delay_ms(unsigned int ms) {
    unsigned int i, j;
    for (i = 0; i < ms; i++)
        for (j = 0; j < 1275; j++);
}In this example, the text buffer is scrolled manually by updating the displayed characters.
Vertical Scrolling
Vertical scrolling is less common on a 16×2 LCD because it requires more complex manipulation and typically involves custom character generation to simulate vertical movement. Here are a couple of approaches:
1. Line Switching
For simple vertical scrolling, you can switch the content of the two lines, simulating a vertical scroll effect.
Example Code for Vertical Scrolling:
#include <reg51.h>
#include "lcd.h" // Assumed to have basic LCD functions like lcd_cmd(), lcd_data(), etc.

void main() {
    lcd_init(); // Initialize the LCD
    lcd_cmd(0x80); // Set cursor to the beginning of the first line
    lcd_write_string("Line 1 Text");

    lcd_cmd(0xC0); // Set cursor to the beginning of the second line
    lcd_write_string("Line 2 Text");

    while (1) {
        delay_ms(1000); // Wait for a second

        // Move Line 2 to Line 1
        lcd_cmd(0x80);
        lcd_write_string("Line 2 Text");

        // Clear Line 2
        lcd_cmd(0xC0);
        lcd_write_string("                ");

        delay_ms(1000); // Wait for a second

        // Move Line 1 back to Line 1
        lcd_cmd(0x80);
        lcd_write_string("Line 1 Text");

        // Restore Line 2
        lcd_cmd(0xC0);
        lcd_write_string("Line 2 Text");
    }
}

void delay_ms(unsigned int ms) {
    unsigned int i, j;
    for (i = 0; i < ms; i++)
        for (j = 0; j < 1275; j++);
}This example alternates the lines to simulate vertical movement.
2. Custom Character Generation
For more complex vertical scrolling, you can create custom characters representing different parts of a character and switch between them to simulate vertical movement.
Example Code for Custom Character Vertical Scrolling:
#include <reg51.h>
#include "lcd.h" // Assumed to have basic LCD functions like lcd_cmd(), lcd_data(), etc.

unsigned char custom_chars[8][8] = {
    {0x00, 0x00, 0x00, 0x00, 0x00, 0x00, 0x00, 0x1F}, // Custom char 1
    {0x00, 0x00, 0x00, 0x00, 0x00, 0x00, 0x1F, 0x1F}, // Custom char 2
    {0x00, 0x00, 0x00, 0x00, 0x00, 0x1F, 0x1F, 0x1F}, // Custom char 3
    {0x00, 0x00, 0x00, 0x00, 0x1F, 0x1F, 0x1F, 0x1F}, // Custom char 4
    {0x00, 0x00, 0x00, 0x1F, 0x1F, 0x1F, 0x1F, 0x1F}, // Custom char 5
    {0x00, 0x00, 0x1F, 0x1F, 0x1F, 0x1F, 0x1F, 0x1F}, // Custom char 6
    {0x00, 0x1F, 0x1F, 0x1F, 0x1F, 0x1F, 0x1F, 0x1F}, // Custom char 7
    {0x1F, 0x1F, 0x1F, 0x1F, 0x1F, 0x1F, 0x1F, 0x1F}  // Custom char 8
};

void create_custom_chars() {
    unsigned char i, j;
    for (i = 0; i < 8; i++) {
        lcd_cmd(0x40 + (i * 8)); // Set CGRAM address
        for (j = 0; j < 8; j++) {
            lcd_data(custom_chars[i][j]); // Write custom char pattern
        }
    }
}

void main() {
    unsigned char i;
    lcd_init(); // Initialize the LCD
    create_custom_chars(); // Create custom characters

    while (1) {
        for (i = 0; i < 8; i++) {
            lcd_cmd(0x80); // Set cursor to the beginning of the first line
            lcd_data(i); // Display custom character
            delay_ms(500); // Wait for half a second
        }
    }
}

void delay_ms(unsigned int ms) {
    unsigned int i, j;
    for (i = 0; i < ms; i++)
        for (j = 0; j < 1275; j++);
}In this example, custom characters are created to represent different parts of a character and displayed sequentially to simulate vertical scrolling.
Using these techniques, you can achieve horizontal and vertical scrolling on a 16×2 LCD, enhancing the interactivity and functionality of your projects.
Whether using built-in LCD commands or custom character generation, scrolling text adds a dynamic element to your displays, making them more engaging and informative.
I hope this helps. Let me know if you have any questions or need further assistance.