When you’re coding for Arduino projects, you can run into many common mistakes. Some mistakes might stop your code from working, and others might make it do things you didn’t expect.
But don’t worry; learning about these mistakes is the first step to improving. Whether you need to use memory better or figure out how to make the hardware work right, you can find ways to solve these problems.
Let’s review some tips to help you fix these issues and improve your coding skills.
- Syntax errors are typos in your code that can stop it from running. Double-check your code for missing semicolons, brackets, or misspelt commands.
- Logic errors: Sometimes, your code runs but doesn’t do what you want because the logic is off. Step back and review your code, checking if every step makes sense.
- Memory management: Arduinos don’t have a lot of memory. Ensure you’re not using too much by storing big files or using too many variables.
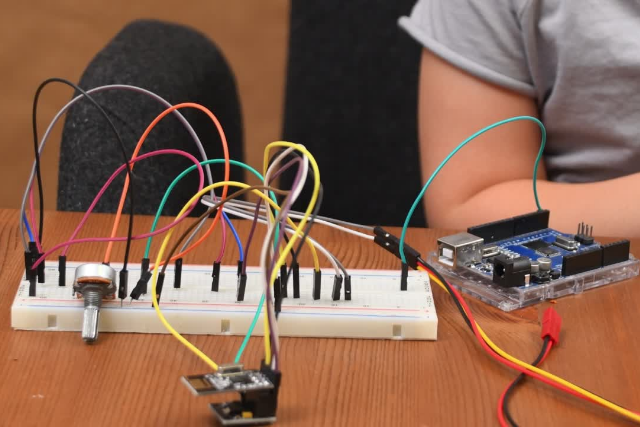
- Hardware issues: Sometimes, the problem isn’t with your code but how it interacts with the hardware. Check your connections and ensure you’re using the right pins and components.
By focusing on these areas, you can solve many common problems and become a better coder.
Key Takeaways
- Double-check code for syntax errors like typos and missing semicolons to ensure smooth execution.
- Use `Serial.print()` and break down code to identify and fix logic errors.
- Optimize memory usage by preferring local variables and using efficient data types to prevent crashes.
- Verify hardware connections and library compatibility to avoid unnecessary troubleshooting.
Understanding Syntax Errors
When you start programming with Arduino, you might hit a roadblock called syntax errors. These happen when you mess up the rules of the C++ language, which is what Arduino uses. It’s kind of like getting the grammar wrong in a language you’re learning; the computer just doesn’t get what you’re trying to say.
You usually find syntax errors when you forget semicolons at the end of a line, mix up curly braces {}, or mess up with the parentheses (). It’s like writing a sentence without the right punctuation or using brackets wrong (it gets confusing, doesn’t it?). The computer feels the same about your messed-up code.
To fix these errors, you need to carefully check your code, line by line, to find these mistakes. It’s pretty much like checking your own writing for grammar errors. If you want your Arduino projects to work well, you need to get good at this careful checking and fixing process.
Resolving Compilation Issues
When you get better at spotting mistakes in your code, you’ll see that fixing problems in your Arduino projects usually starts with these errors. Making sure all your libraries work well together is also super important. Sometimes, if libraries don’t match or are too old, they can stop your project from working right. So, by taking care of these issues, you’re really helping yourself get better at fixing problems and making your coding smoother.
Syntax Errors Explained
Understanding syntax errors is key when you’re trying to find and fix problems in your Arduino projects. These errors pop up when your code doesn’t follow the rules of the programming language, which stops your project from working. Here’s what you can do about them:
- Check for missing semicolons: Each line of code in Arduino (which uses C++) needs to end with a semicolon. If you forget one, it might lead to errors you didn’t expect.
- Ensure proper use of braces: Curly braces `{}` are used to group together sections of code. Make sure that every brace that opens is also closed properly.
- Verify variable declarations: You have to tell the program what type of data each variable holds before you use it. Mistakes in spelling types or variable names are pretty common syntax mistakes.
Just keep these tips in mind, and you’ll find it easier to spot and fix those annoying errors that keep your project from running smoothly.
Library Compatibility Checks
After you get the hang of fixing basic mistakes in your code, the next big step is dealing with issues that come up because different libraries don’t always work well together. Think of libraries as extra tools you add to your toolbox to do more cool stuff with your code. But, just like you can’t use a hammer to screw in a screw, not every tool (or library) is going to fit with your Arduino project. You need to make sure everything plays nicely together. Here’s a simple breakdown of problems you might face and how to fix them:
| Problem | How to Fix It |
|---|---|
| Errors when making | Look up the library guide |
| Things acting weird | Check if you have the right version of the library |
| Can’t find functions | Make sure the library works with your board |
| Trouble with serial port | Get the latest library or try a different one |
| Running out of memory | Use libraries that need less space |
It might feel overwhelming to dig through all that info, but getting to know the ins and outs of your libraries is key. Remember, with the power to build cool projects comes the need to do a bit of homework and figure things out.
Fixing Logical Errors
Why do some awesome Arduino projects not work right? Often, it’s because of logical errors. These are tricky mistakes in your code that mess things up, making you wonder what went wrong. Let’s look at how to fix these issues so your projects run well.
Here’s how to deal with logical errors:
- Break It Down: Split your code into smaller parts. This makes it easier to find and fix where things are going wrong. Test each part on its own to find where the mistake is.
- Use Serial Outputs: Use `Serial.print()` to watch what’s happening with your variables and how your program is running. Putting these in your code helps you see how your variables are changing and where the logic isn’t doing what you thought it would.
- Think Like a Machine: Keep in mind that your Arduino takes your instructions very literally. Look at your logic as if you were the machine – there might be a big difference between what you think it understands and what it actually does. This way of thinking is key to finding where you went wrong.
Fixing logical errors takes patience and a step-by-step method. By breaking down your code, using tools to check what’s happening, and thinking like your Arduino, you can get your projects working right again.
Memory Management Mistakes
When you work on Arduino projects, it’s really important to keep an eye on how much memory your device has because there isn’t a lot. If you don’t pay attention, your project can stop working or act weird. A big mistake is not letting go of memory you don’t need anymore. Imagine you keep putting water into a bucket but never pour any out. Eventually, it will spill over. That’s what happens when you don’t free up memory.
You need to be careful with how much memory you use for your variables and the codes you add. Arduino boards don’t have much memory to begin with. If you use big codes or too many global variables (those are the variables you can use anywhere in your code), you’ll run out of memory really quickly. It’s like trying to pack everything you own into a tiny suitcase for a trip. You have to be picky about what you bring.
To avoid running out of memory, try to use local variables. These are variables you use inside a function, and they don’t take up space after the function is done. If you’re dealing with a lot of data, think about using smaller pieces of data or squeezing the data to make it smaller. It’s like vacuum-packing your clothes to make everything fit in your suitcase.
In short, you have to be smart about how you use the memory in your Arduino. It’s like having a small room to work in. You can do a lot, but you have to be organized.
Incorrect Use of Data Types
Choosing the right types of data is super important for saving space in your Arduino projects. Picking the wrong ones can eat up memory you could use for other things. When you’re playing around with your Arduino, you really need to pay attention to how much memory you’re using, especially for bigger projects or when you want things to run smoother.
Here are three common slip-ups with data types and how to dodge them:
- Don’t always use `int`: A lot of new folks use `int` for numbers without thinking twice. But, `int` takes up more room. If your number is between 0 and 255, choose `byte` instead. It uses way less memory.
- Be careful with `String` objects: They’re easy to use but can mess up your memory because they keep changing size. Try to use `char[]`, or character arrays, even though they might be trickier to work with. They’re much better for saving space.
- Use `enum` for keeping track of states: If you have different states or types in your project, don’t just make a bunch of constants. Use an `enum`. It makes your code easier to read and is smarter with memory by picking the smallest data type that works.
Debugging Infinite Loops
When you’re working with Arduino and writing code, sometimes you might accidentally make an infinite loop. This is like hitting a wall where your project just won’t move forward no matter what you do. It’s pretty annoying, right? Well, let’s figure out how to get past this problem.
An infinite loop happens when the code keeps doing the same thing over and over again without stopping. It’s like telling your code to wait for something impossible before it can stop. To fix this, you need to make sure your loop has a clear end point. For example, you could make the loop stop when a sensor detects a certain thing or after a certain amount of time has passed.
A helpful trick is to use serial print statements in your loops. This means your code will send messages to your computer while it’s running, which can show you what’s happening step by step. It’s a great way to see where things might be going wrong.
And don’t forget about the break; statement. Think of it as an emergency stop button for your loop. When something specific happens, you can use break; to jump out of the loop right away and move on with the rest of your code.
Managing Libraries Efficiently
When you’re working with Arduino projects, it’s really important to keep your libraries in check. If you don’t install them right or keep them organized, you’ll end up facing annoying errors and wasting time.
Let’s go over how to avoid these mistakes and keep your files neat, making your coding a lot smoother.
First off, make sure you’re putting your libraries in the right spot. Arduino has a specific folder for libraries, and you want to make sure everything goes there. This makes it easy for the Arduino software to find and use them when it needs to.
Next up, pay attention to library updates. Sometimes, the people who make these libraries release updates that fix bugs or add new features. Keeping your libraries up to date can help your projects run better.
Also, it’s a good idea to keep your libraries tidy. If you have libraries you’re not using anymore, consider removing them. This can help avoid confusion and make sure you’re only working with what you need.
And here’s a tip: use library managers. The Arduino IDE has a library manager that makes it super easy to find, install, and update your libraries. It’s a great tool to help you manage everything without having to do it manually.
Lastly, remember to check for compatibility. Not all libraries work with all Arduino boards. Before you get too deep into your project, make sure the libraries you’re using are compatible with your board. This can save you a lot of headaches later on.
Library Installation Errors
When working on Arduino projects, it’s easy to run into annoying problems if libraries aren’t set up right. Making sure they work well is key. Here’s a simple guide:
- Check if they match: Before getting a library, make sure it fits with your Arduino version. This step stops a lot of trouble caused by mismatched code.
- Library Manager is a big help: The Arduino IDE comes with something called the Library Manager. It’s really helpful because it makes adding libraries much easier, ensures you have the right library version, and keeps things updated.
- Putting in libraries by hand: Sometimes, you need to add libraries yourself. If you do, just follow the directions that come with the library. You should put the library folder right into the `libraries` folder where your Arduino software is installed.
Organizing Library Files
After you’ve got your libraries set up right, it’s super important to keep them tidy so you can work better. If your library is all over the place, it can make things confusing, and you might end up doing the same thing more than once or making mistakes.
You should put your libraries into groups based on what they do. For example, put all the libraries that deal with sensors together. Make sure the names of your folders are clear and describe what’s inside, so you can find stuff easily.
Every now and then, go through your libraries and get rid of the ones you’re not using anymore. This helps keep your workspace clean. If you’re working on a bunch of different projects, it might help to have separate sets of libraries for each project to make things smoother.
Using a version control system is a smart move too. It lets you keep track of any changes you make and go back to older versions if you need to.
Keeping your libraries organized isn’t just about making things look neat. It’s about making your work easier so you can come up with cool new ideas without getting slowed down by mess.
Troubleshooting Hardware Interactions
Understanding how different parts of your hardware work together is super important when you’re trying to figure out why your Arduino project isn’t acting right. Even if your code looks perfect, the issue might be with the physical setup. Here’s how you can tackle these problems:
- Check Connections: It’s key to make sure everything is plugged in tight. A loose wire or a bad soldering job can mess things up big time. Don’t just look at it from afar; get in there and check each connection by hand.
- Verify Components: Sometimes parts don’t work right because they came that way or broke. Try swapping out parts you’re unsure about with ones you know work. This goes for everything from the little sensors to the Arduino board itself.
- Power Supply Issues: If your project is acting weird, the power supply might be the problem. Ensure your project has the right kind of power source and is steady. Watch out for signs like the project resetting on its own or parts not doing what they’re supposed to.
Conclusion
You’ve just learned how to deal with common problems in Arduino programming. This includes fixing mistakes in your code, making sure your program uses memory properly, and dealing with errors when your program is being put together.
You now know how to solve problems with logic, work with different data types easily, handle never-ending loops, and use libraries correctly.
You’ve also figured out how to fix issues with the hardware. Keep these solutions ready, and you’ll find coding much easier. Remember, every mistake is a chance to get better at coding.

