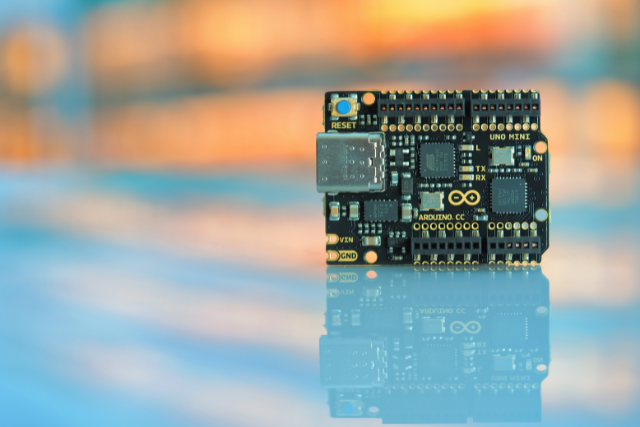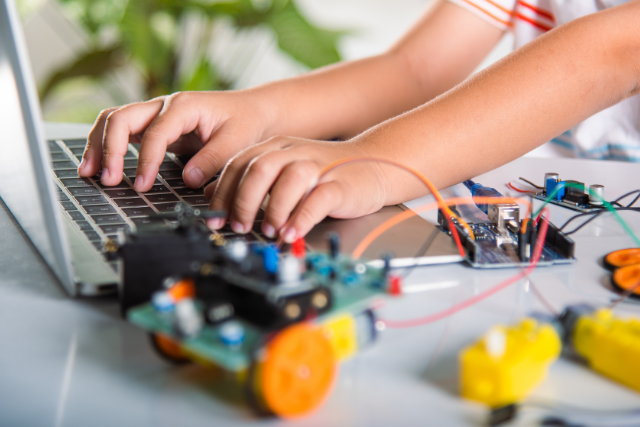
Starting your first Arduino project is exciting! You’ll need a few key things to get going. First, you need an Arduino board – think of it as the brain of your project. The Arduino board is super important.
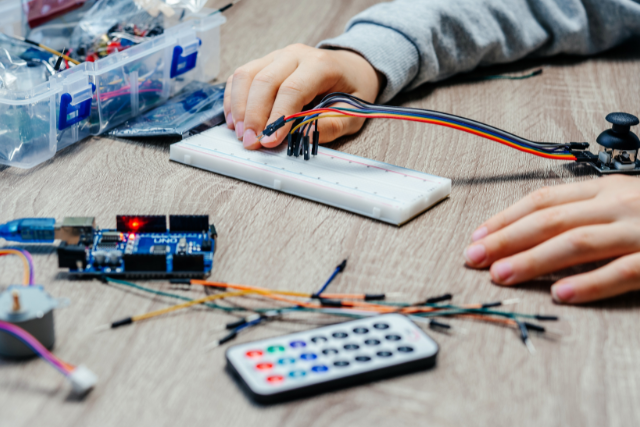
Next, make sure you have a good power supply; it keeps everything running, just like food gives you energy. You’ll also want a breadboard and some resistors. These help you test out ideas easily without making anything permanent. Think of them as your sketchbook for electronics.
You’ll also need capacitors, LEDs, pushbuttons, jumper wires, and sensors. These are like the extra tools that make your project cool and functional. Capacitors help control the flow of electricity, LEDs light up, pushbuttons let you send signals when pressed, jumper wires make connections, and sensors can detect things like light, temperature, or motion.
So, gather up your breadboard, resistors, capacitors, LEDs, pushbuttons, jumper wires, and sensors. With these parts, you’re ready to start building and experimenting. It’s like putting together the pieces of a puzzle. Have fun and see what you can create!
Key Takeaways
- Choose the right Arduino board for your project, such as Uno, Nano, or Mega.
- Ensure you have a reliable power supply, like a battery or USB power.
- Gather essential components like resistors, capacitors, LEDs, and push buttons.
- Incorporate sensors for interactivity and to bring your project to life.
Selecting the Right Arduino Board
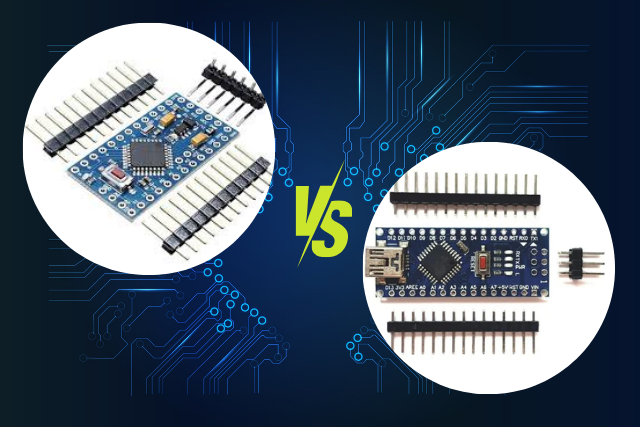
Picking the right Arduino board is an important first step when you’re excited to start a new project. There are a lot of options, but this is a good thing because it means you can find just the right one for what you need. Think of it like picking your favourite dish from a big menu.
If you’re new to this, the Uno is a great place to start. It’s easy for beginners and works for many different projects. It’s like a friendly guide that introduces you to how everything works. If your project needs to fit into a small space or you’re making something you can wear, the Nano is probably what you’re looking for. It’s small but still very powerful.
For projects that need a lot of pins and memory, because they’re big or complicated, the Mega is the way to go. It’s like having a bigger toolbox for your bigger ideas.
Essential Power Supply Options
After picking your Arduino board, it’s important to think about how you’re going to power it up. If your project is going to move around and won’t be hooked to a computer, choosing the right battery is a big deal. But if it’s going to stay connected, then knowing how to handle USB power is a must to keep things running smoothly. Let’s dive into these key power supply choices to make sure your project doesn’t run out of juice.
Choosing the Right Battery
Picking the right battery for your Arduino project is super important. It makes sure your project works well and keeps going. You have lots of choices, but it’s key to pick one that fits what your project needs. Think about how much power and how much juice (capacity) it needs. Most Arduino boards need 5V, but the stuff in your project might need something different.
For small projects, AA or AAA batteries are easy and work fine. If you’re doing something bigger or more complicated, rechargeable lithium-ion batteries are great because they last longer and give more power. Also, don’t forget about getting a battery holder or shield. This helps keep your battery connected well and safely.
USB Power Considerations
Thinking about using USB for powering your Arduino project? It’s a smart move. You can use USB power banks or your computer’s USB port for a power source that’s easy to carry around. This means you can work on your projects anywhere, without needing a wall plug. Plus, using USB power is simple.
You don’t have to worry about matching voltages or complicated wiring. Just plug it in, and you’re set. However, it’s important to know that not all USB ports are the same. Some give more power than others. Make sure to check the power output to see if it fits what your Arduino needs. Using USB power can make working on your projects more flexible.
Breadboards for Prototyping
When you start building with an Arduino, using a breadboard is super helpful. It’s a tool that lets you try out different parts of your project and change things easily without having to make anything permanent by soldering. This way, you can mess around, try different setups, and see what works best. Making mistakes is part of the fun and how you learn.
Here’s why using a breadboard for your Arduino projects is great:
- Flexibility: It’s easy to put parts in and take them out, so you can try lots of ideas fast. This is helpful whether you’re just starting or you’ve been doing this for a while.
- No Soldering Required: You don’t have to deal with soldering, which can be messy and hard to change later. Breadboards let you test out your ideas without having to stick to one thing.
- Reusable: You can use a breadboard over and over for many projects, not just one. It’s a good thing to have since you’ll use it a lot and it saves you from having to buy new ones all the time.
A Variety of Resistors
When you start playing with breadboards for your Arduino stuff, it’s super important to also think about resistors. These little guys help control how much electricity goes through your gadgets, making sure nothing gets fried.
Resistors come in different strengths, which we measure in ohms. You’ll want a bunch of different ones so you can adjust how much electricity is flowing in your projects. A good idea is to grab a pack with lots of types, from 220 ohms to 1 megaohm. This way, you can try lots of things without having to stop and buy more all the time.
Also, knowing how to read the colours on resistors is key. Each colour stripe tells you a number, and these numbers together show the resistor’s strength. It might take a bit to get the hang of this, but it’s worth it for all the cool stuff you’ll be able to do.
Capacitors for Energy Storage
Capacitors are like little energy banks in your circuits. They store and release energy when your project needs it, just like how resistors control the flow of electricity. By using capacitors smartly, your Arduino projects can get even better.
Here’s why capacitors are great to have around:
- Voltage Smoothing: They help keep the power supply steady. This is super important for parts that need stable power to work well.
- Energy Storage: When you need a quick burst of energy, capacitors have it ready to go. They’re awesome for when your project needs a sudden boost.
- Noise Filtering: Capacitors can clean up unwanted “noise” from your power supply. This means your circuit works more smoothly and reliably.
Adding capacitors to your project is more than just using extra parts. It’s about making your projects more flexible and dependable. As you explore more with Arduino, knowing how to use these key components can help your designs shine.
LEDs for Visual Outputs
After learning about capacitors in Arduino projects, let’s talk about LEDs. LEDs, short for Light Emitting Diodes, make your projects look cool and give you important info about what’s going on in your circuit.
You can use LEDs to show if a device is on or off, or if something like sending data is happening. Playing with different colours can make your project look better and work better too. Here’s a simple guide to some LED basics:
| LED Color | Typical Use |
|---|---|
| Red | Error or warning |
| Green | Everything is good |
| Blue | Connected to something |
Remember, LEDs need a current-limiting resistor so they don’t burn out. The resistor you need changes based on your LED and how much voltage you’re using. You can find tools online to figure out the right resistor.
Adding LEDs to your Arduino projects makes them look nicer and gives you a cool way to tell what’s happening. Try them out and see how they can light up your projects in new ways!
Pushbuttons for Input
Next, let’s talk about pushbuttons for your Arduino projects. These are basic but very important parts of making things work. You need to pick good quality pushbuttons and learn how to connect them properly so your projects do what you want them to do. We’ll go through how to get good at using these for fun and useful projects.
Choosing Quality Pushbuttons
When picking pushbuttons for your Arduino project, it’s really important to go for the good ones. This makes sure your project works well and is fun to use. Here’s what to keep an eye out for:
- Durability: Look for pushbuttons that are made of strong stuff. They need to handle a lot of pressure without breaking down.
- Sensitivity: A nice button doesn’t need much push to work. This makes it react better and stops your fingers from getting tired if you’re using it a lot.
- Consistency: Every time you press the button, it should feel the same. If a button feels different each time, it can be confusing and mess things up.
Wiring and Configuration Tips
To get your pushbuttons working great with your Arduino project, here’s what you need to do. First, connect one side of your pushbutton to a digital input pin on the Arduino. Then, connect the other side to the ground.
A smart move is to add a 10kΩ pull-up resistor between your input pin and the power. This trick stops your input from being unsure when the button isn’t pushed, making sure your Arduino always gets a clear HIGH or LOW signal.
Now, for your code, set up your pushbutton pin as an INPUT_PULLUP in the setup section. So, when you press the button, the circuit is complete, and the input pin shows LOW. It’s straightforward and exactly what you need.
Jumper Wires for Connections
Jumper wires are super important for connecting parts in your first Arduino project. They’re like the secret helpers that let you play around without needing to solder, making learning a lot easier. With these connectors, you can change your circuit, fix errors, or add new parts quickly. To get the most out of jumper wires, remember these three things:
- Variety is Key: Make sure you have different kinds of jumper wires: male-to-male, male-to-female, and female-to-female. This mix lets you connect various parts and boards easily.
- Organization Matters: Using different colours for your wires can save you a lot of headaches. It makes it easier to see what’s connected to what and helps when you’re trying to figure out a problem.
- Quality Counts: Choose jumper wires that are well-made with strong connectors and bendy cables. Good quality wires won’t break or bend easily, so your projects will last longer and work better.
Sensors for Interactivity
Making your Arduino projects interactive by adding sensors can bring them to life. Think of sensors as the way your project can see, hear, and feel what’s happening around it. This lets your project react to the real world in cool ways.
For example, you can make a weather station that knows it’s cold, a lamp that turns on with a touch, or an alarm that goes off when someone walks by.
Here’s a simple guide to some common sensors and how you can use them:
- Temperature Sensor: This measures how hot or cold it is. You can use it for projects like a weather station or making your home’s heating smart.
- Motion Sensor: This can tell when someone or something moves in a place. It’s great for making alarms or lights that turn on by themselves.
- Light Sensor: This sensor checks how bright it is. You can use it for screens that change brightness automatically or for keeping an eye on plants.
- Touch Sensor: This can tell when it’s being touched or pressed. It’s perfect for making things that turn on or do something when you touch them, like interactive art.
Adding sensors to your Arduino project makes it way more interesting because it can interact with and respond to what’s happening around it. It’s not just about making something complicated; it’s about making something that feels alive and reacts to the world. So, try adding these sensors to your projects and see what cool things you can create!
Conclusion
You’re all set for your first Arduino project. Think of it like picking out tools for a fun project. You need to pick the right Arduino board, make sure it has power, and use sensors to make it do cool stuff. Keep in mind, that breadboards, resistors, capacitors, LEDs, pushbuttons, and jumper wires are going to be super helpful.
Get ready to jump into the Arduino world. You’re about to turn your ideas into real things and see how fun electronics can be. Have a great time building!