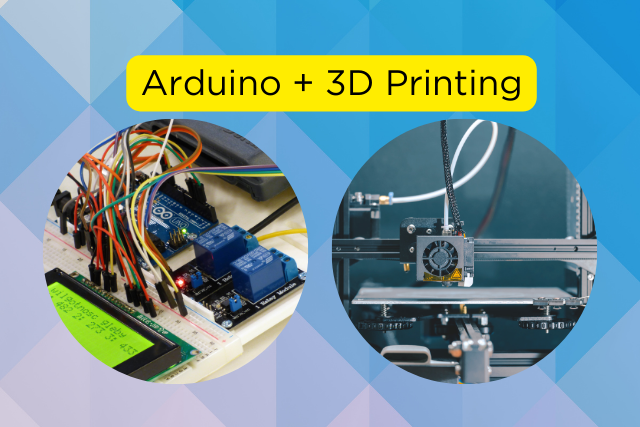
Arduino uses a C/C++-based programming language that makes it easy for beginners to get started. But you’ll need to learn the basics of Arduino code structure and syntax to start programming effectively.
This guide will provide an overview of the key elements of Arduino code to get up and running.
Setup() and Loop()
All Arduino sketches consist of two main parts – the setup() function and the loop() function.
Table 1: Arduino Code Structure
| Code Section | Purpose |
|---|---|
| void setup() | It runs once at the start |
| void loop() | Runs continuously in a loop |
The setup() function runs only once when the sketch starts:
void setup() {
  // initialize pins and settings here
}The loop() function runs continuously over and over again in a loop after setup() completes:
void loop() {
  // main program code here
}Any instructions inside loop() will repeat indefinitely. This is where the bulk of your program code will go.
Comments
You can add comments to your code using // or /* */ to leave notes or reminders:
// This is a single line comment

/* This is
a multi-line
comment
*/The compiler ignores comments and won’t execute.
Variables
You can store data in variables to use in your code. Syntax:
int sensorReading = 0; //integer variable
float voltage = 3.3; //float variable
boolean ledOn = false; //boolean variableReadings from sensors, pin states, and other data can be saved in variables.
Table 2: Data Types
| Data Type | Description | Example |
|---|---|---|
| int | Integer number | int sensorReading = 0; |
| float | Number with decimal point | float voltage = 3.3; |
| boolean | True or false value | boolean ledOn = false; |
Strings
The Arduino String object allows you to store and manipulate text strings:
Creating Strings
String myString = "Hello World!"; //creating a stringConcatenation
String name = "John "; String greeting = name + "Doe"; //Hello John Doe!Printing Strings
Serial.println(greeting); //prints the stringOther String functions like length(), compareTo(), substring() etc. are also available.
Common Functions
Some built-in functions like pinMode(), digitalRead(), digitalWrite() are used often:
pinMode(LED_PIN, OUTPUT); //Set pin as output
bool pinState = digitalRead(SENSOR_PIN); //Read input pin
digitalWrite(LED_PIN, HIGH); //Turn LED onThere are many other functions available depending on your needs.
Table 3: Common Functions
| Function | Purpose |
|---|---|
| pinMode() | Configures Arduino pin as input or output |
| digitalRead() | Reads the state of an input pin |
| digitalWrite() | Sets output pin high or low |
Operators
Operators like arithmetic (+ – * /), comparison (==, !=) and logical (&&, ||) are used to manipulate variables and pin states:
int sum = sensorValue + 10; // + Addition
if(sensorValue > 500) { // > Comparison
  digitalWrite(LEDpin, HIGH);
}Table 4: Operators
| Operator | Function | Example |
|---|---|---|
| + | Addition | sensorValue + 10 |
| – | Subtraction | sensorValue – 10 |
| * | Multiplication | sensorValue * 10 |
| / | Division | sensorValue / 10 |
| == | Equal to | if(x == 10) |
| != | Not equal to | if(x != 10) |
| > | Greater than | if(x > 10) |
| < | Less than | if(x < 10) |
| && | Logical AND | if(x > 5 && y < 10) |
| || | Logical OR | if(x < 5 || y > 10) |
Digital & Analog I/O Pins
Arduino boards contain both digital and analog input/output pins which are used to interface with sensors, motors, lights, and other components.
Digital Pins
Digital pins can read and write discrete on/off voltage values, equivalent to binary 1 or 0 states. They connect digital sensors and drive LEDs, motors, and other low-current devices. Reading the input state from a digital pin:
int buttonState = digitalRead(2); //read from digital pin 2Writing an output state to a digital pin:
digitalWrite(3, HIGH); //set digital pin 3 high (5V)Analog Pins
Analog pins can read a range of voltages from 0 to 5 volts, representing a continuous range of values. They are commonly used for reading variable voltage outputs from analog sensors like temperature, light, humidity and ultrasound.
Reading an analog input pin:
int sensorValue = analogRead(A5); //read analog pin A5The analogRead() value ranges from 0 to 1023, representing voltages from 0V to 5V.
Analog pins cannot provide an analog output voltage, only digital HIGH/LOW states. But they can be used with PWM to mimic analog-like behaviour.
Control Structures
Control structures allow you to control the flow of your Arduino program using conditional logic, loops, and other mechanisms. Here are some common control structures:
if/else
The if/else statement executes different blocks of code depending on whether a condition is true or false:
int sensorReading = analogRead(A0);
if(sensorReading > 400)
{
// do something if reading exceeds threshold
}

else
{
// do something else if reading is less than threshold
}for Loop
The for loop repeats a block of code a certain number of times:
for(int i=0; i<10; i++)
{
// flash LED 10 times
digitalWrite(LED_PIN, HIGH);
delay(100);
digitalWrite(LED_PIN, LOW);
delay(100);
}while Loop
The while loop repeats code over and over as long as a condition remains true:
while(digitalRead(BUTTON_PIN) == HIGH)
{
// keep flashing LED while button pressed
digitalWrite(LED_PIN, HIGH);
delay(100);
digitalWrite(LED_PIN, LOW);
delay(100);
}switch/case
The switch/case statement runs different code blocks based on the value of a variable:
switch(sensorValue)
{
case 0: // do something if value is 0
break;
case 1: // do something if value is 1
break;
default: // do something if no case matches
}Arrays
Arrays allow you to store multiple values of the same type in a single variable. This is useful for storing data from multiple sensors, keeping track of output states, and other collections of related values.
Declaring Arrays
Arrays are declared by specifying the data type and size:
int sensorValues[5]; //array of 5 ints
char msg[10]; //array of 10 chars
boolean LEDstates[3]; //array of 3 booleansAccessing Array Values
Array elements are accessed using an index number:
sensorValues[0] = analogRead(A0); //first element
sensorValues[4] = analogRead(A4); //fifth elementIterating Arrays
A for loop can be used to iterate through each element in an array:
for(int i=0; i<5; i++)
{
sensorValues[i] = analogRead(i); //read analog pins 0-4
}Arrays vs Vectors
Arrays have a fixed size that needs to be declared ahead of time. For arrays that need to resize dynamically, use a Vector instead.
Libraries
Libraries provide extra functionality not available in the core Arduino language. Many common tasks, like interfacing sensors, require a library.
Including Libraries
Libraries are included at the top of a sketch:
#include <Servo.h> //include servo libraryUsing the Library
After including, functions can be called:
Servo myServo; // create servo object
myServo.attach(9); // attach servo on pin 9
myServo.write(90); // set servo to 90 degreesSome common libraries:
- Servo – for controlling servo motors
- Wire – used for I2C communication
- SPI – used for SPI communication
- SD – for reading/writing SD cards
- EEPROM – reading/writing to internal EEPROM memory
There are tons of open-source Arduino libraries available online.
Concluding Remarks
The capabilities of Arduino are limited only by your programming skills and creativity. This guide provides the core syntax you need to start acquiring those skills. For further learning, refer to the official Arduino documentation and example sketches included with the IDE.
An Arduino is an incredibly flexible platform for creating interactive electronics projects. Combining your new programming abilities with a basic understanding of circuits and electronics allows you to build amazing Arduino projects – endless possibilities!

